By Tom Interval
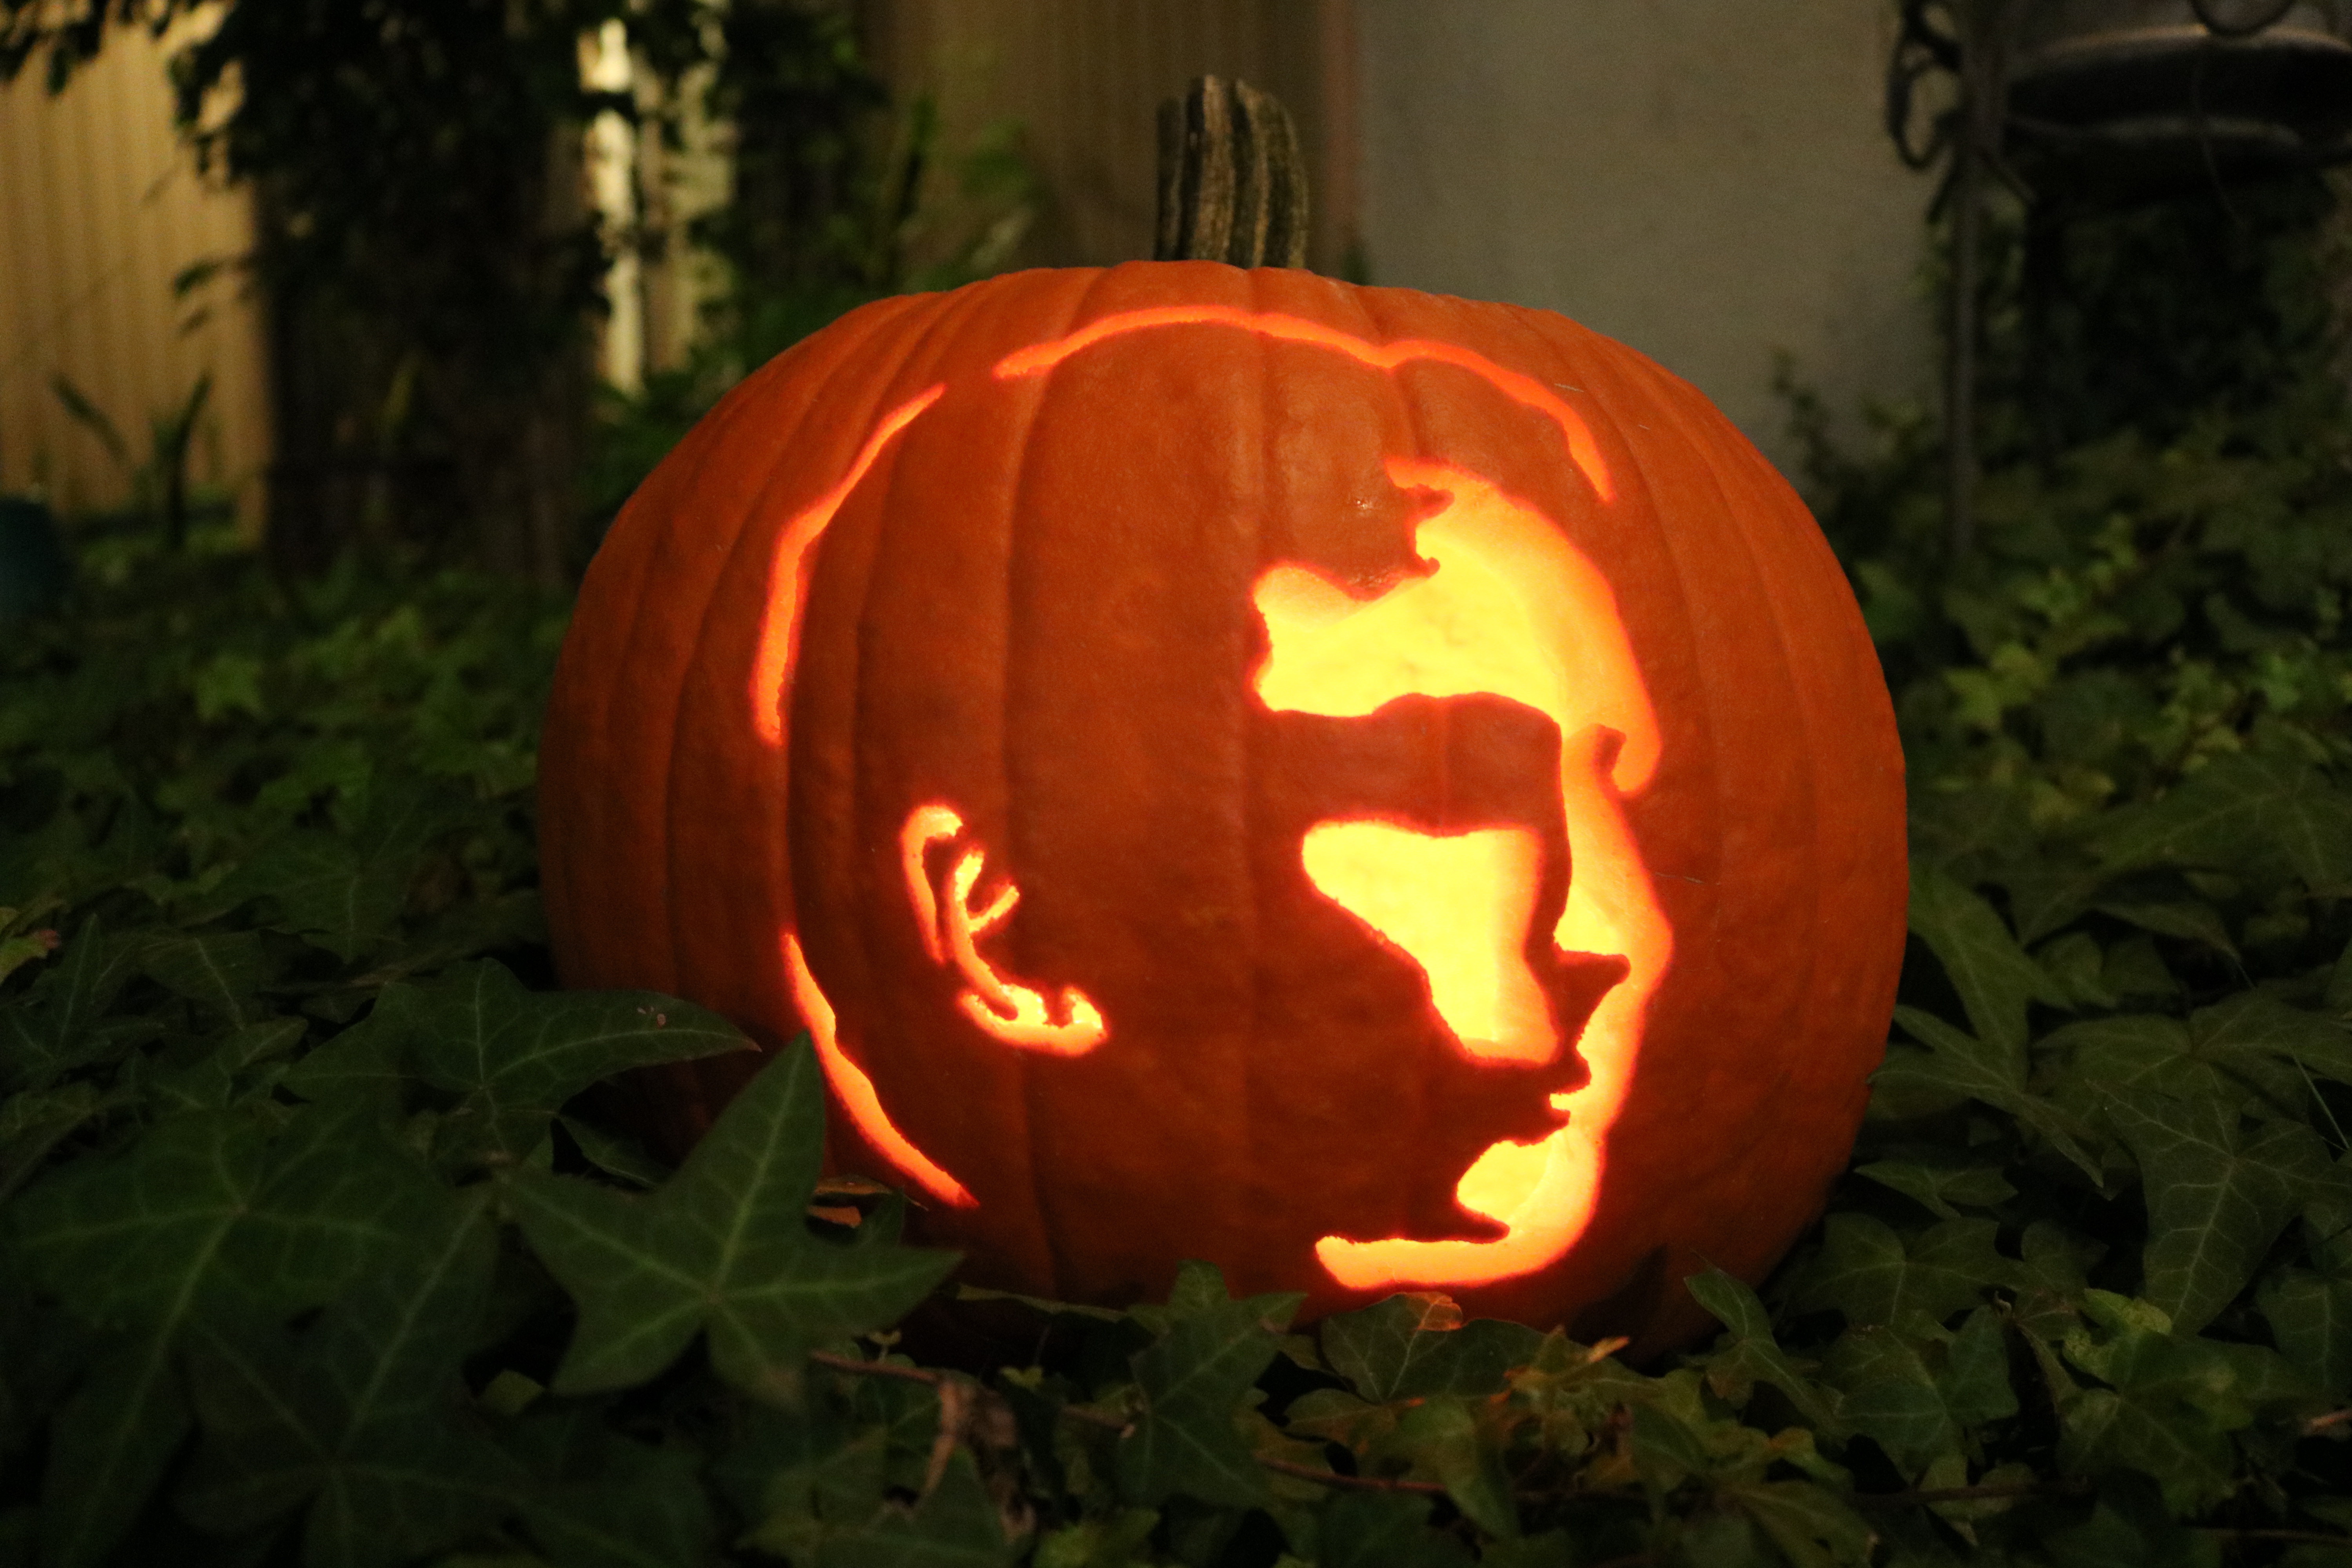
Another year, another Houdini jack-o’-lantern. This Halloween, it will be 95 years since Harry Houdini died. Each year I carve a pumpkin in his memory, and this year’s edition features a young Houdini, no older than 25 years. So without further delay, here’s this year’s Houdini jack-o’! And if you’re interested to see what steps I followed to make it, scroll down.

Step 1: Find a photo that works well.
Not all photos are equal. Some look better when you make them high contrast. Here’s the photo I chose this year. It’s from an 1899 Mahatma ad.

Step 2: Make it high contrast in Photoshop.
If you don’t have Photoshop, you can use any free, good photo-editing program like Gimp to change the image mode to grayscale (black and white), adjust the contrast, and make tweaks so it looks something like the following image. Notice that all the black areas connect since that’s going to be the uncut part of the jack-o’-lantern. Also notice how I outlined the hair.

Step 3: Create a gray template in Word and print.
Insert the high-contrast photo into Word or any word-processing program, adjust its size based on the size of the pumpkin, increase the brightness, and lower the contrast so it looks something like the following template.

Step 4: Print, cut out, and outline your template.
Print the Word document you created in Step 3 and cut it out close around the perimeter of Houdini’s head (allow around a 1/2″ margin). Then use a thin black marker to outline the separation of highlights and shadows. It should look something like the following image. (Note that I’ve already laid out protective plastic.)

Step 5: Cut off the lid and hollow out the pumpkin.
Use a highlighter to draw where you want to cut around the stem. Use a large, dull serrated knife from a pumpkin-carving kit to cut around the stem and remove the top of the pumpkin. Wipe off the highlighter guidelines. Hollow out the pumpkin. The mess you make will look something like this.

Step 6: Tape the template to the pumpkin.
Figure out exactly where you want Houdini’s face to appear on the pumpkin, then tape the template solidly into place with Scotch tape. In doing this, you’ll have to push down firmly on the template as you form it around the pumpkin’s curve. Having a few creases in the paper by the time you’re finished is normal, but be sure none of the creases interferes with the design.

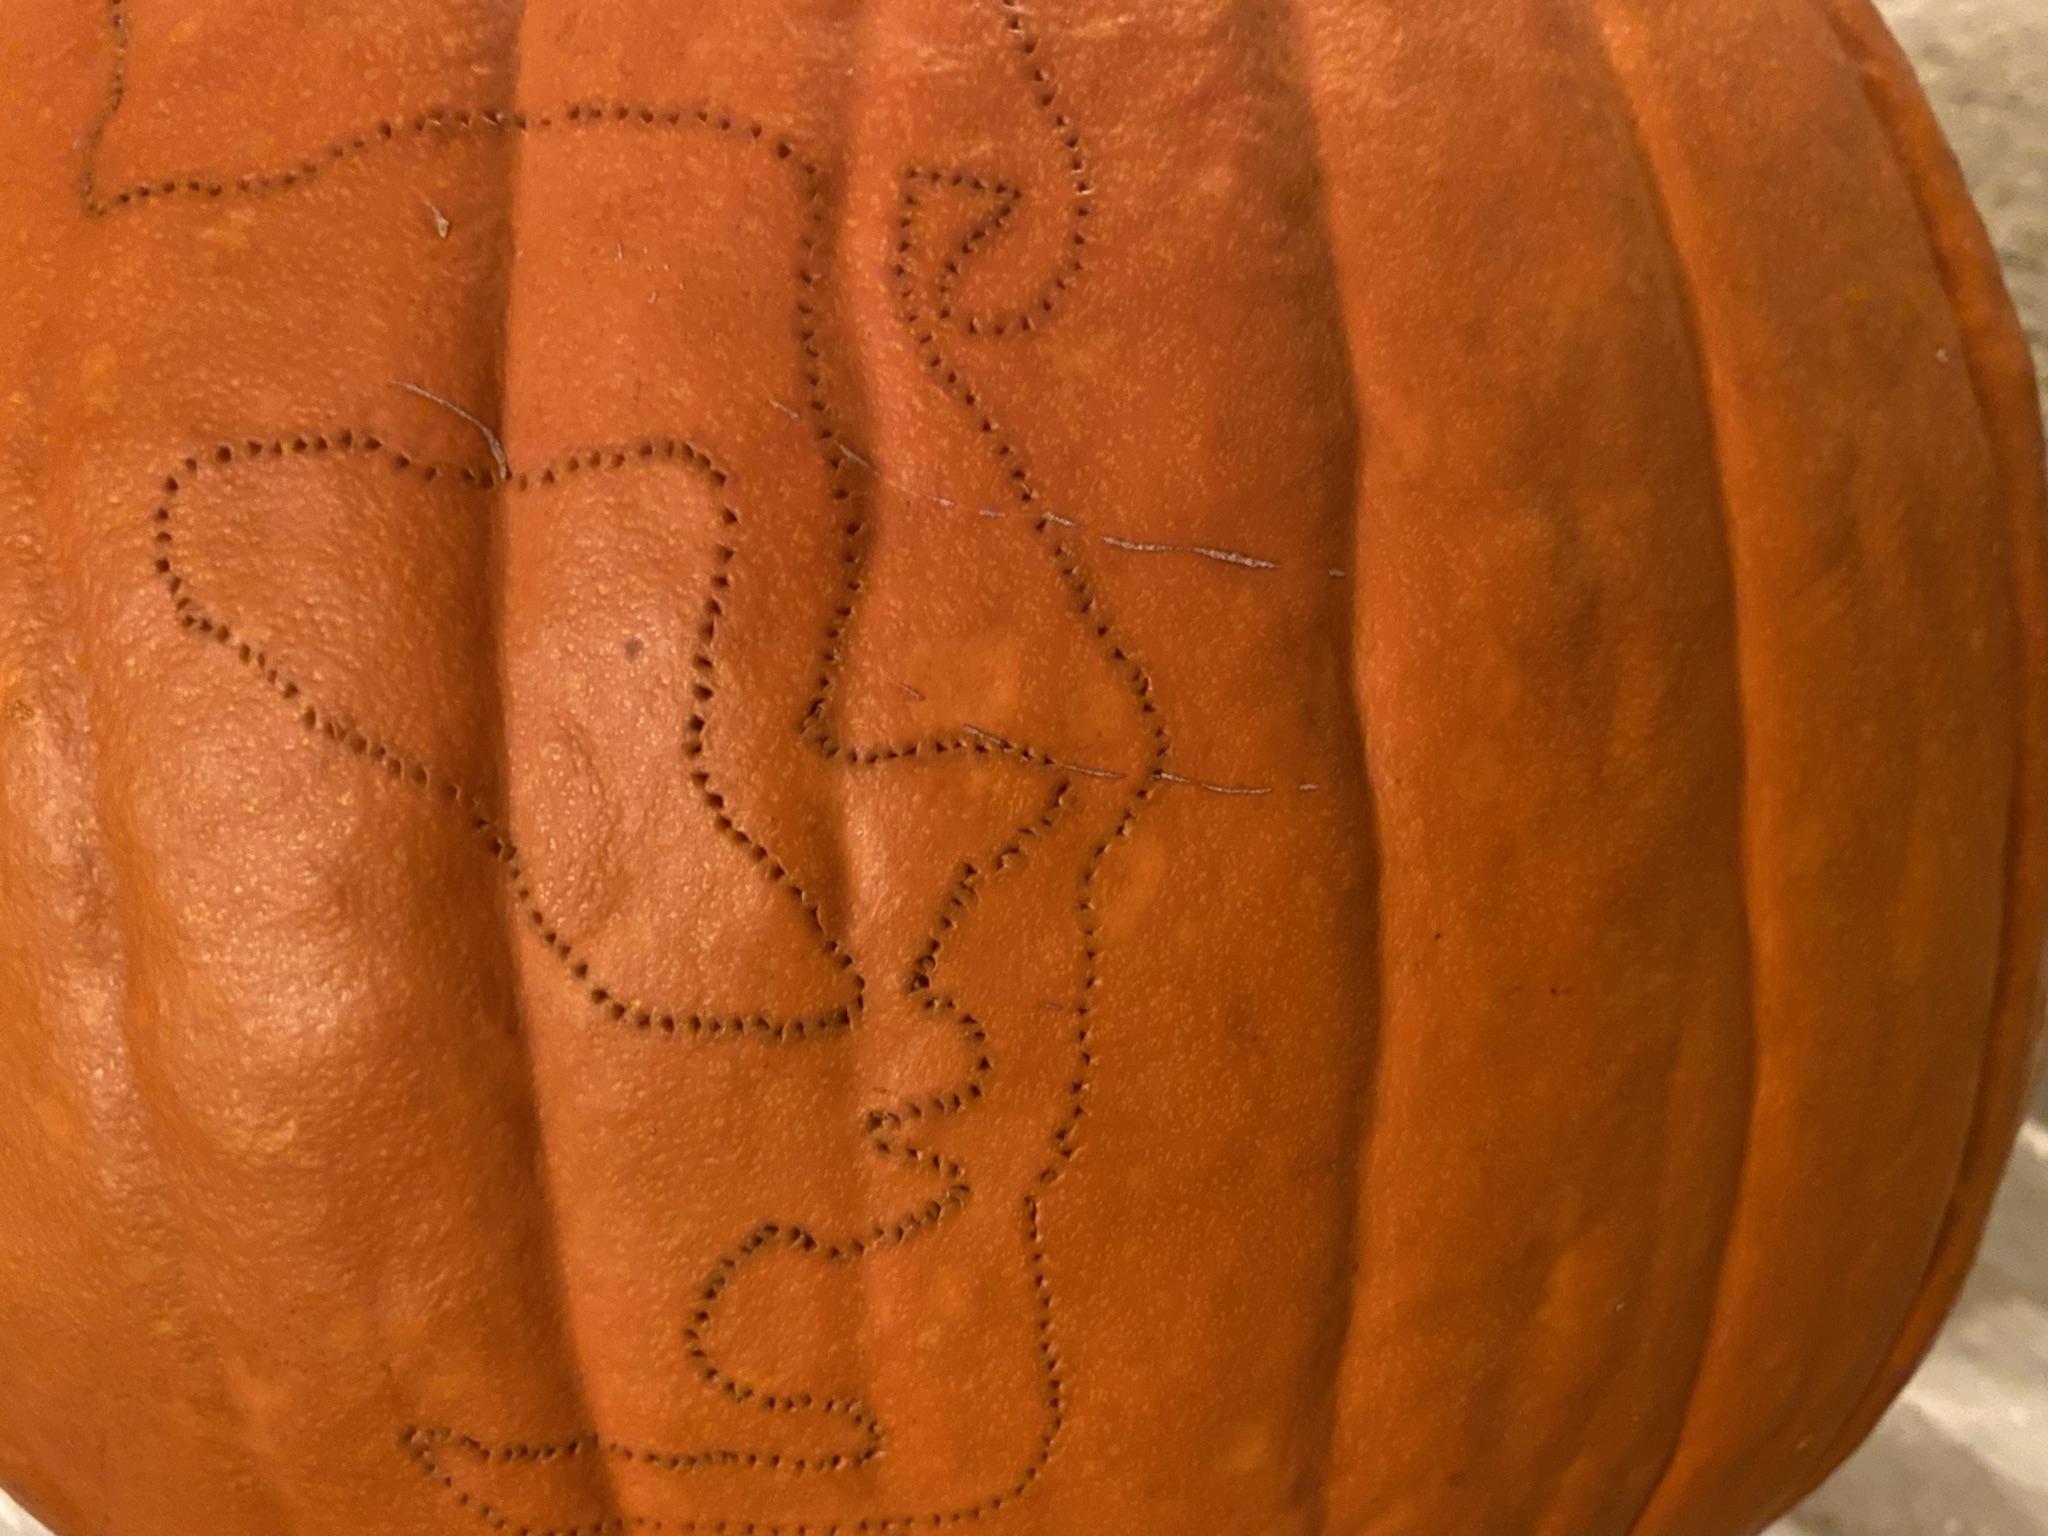
Step 7: Trace the pattern from the template to the pumpkin.
Use a safety pin to prick through the paper into the pumpkin in an evenly spaced dotted line along the black lines that separate shadows from highlights. This will take some time and will look something like this when you’re finished. Look closely and you’ll see the pin pricks.

Step 8: Remove the template from the pumpkin.
After you’re sure you pricked all along the black lines, carefully remove the template from the pumpkin, which will look something like this.

Step 9: Carve the face into the pumpkin.
Use various serrated knives from a pumpkin-carving kit to cut along the dotted lines. Remember, the highlighted (white) areas of the template are the parts you cut out and discard. Use smaller-sized carving knives to cut away thin pieces. Be mindful here because it’s really easy to accidentally cut through parts you don’t want cut. And after you cut out each of the parts, you’ll probably have to do some refined cutting along the edges of the openings to shape them from the inside outward. When you’re finished, wipe down the entire pumpkin and lid with a damp cloth and dry it. It should look something like the following image. Use LED lights to illuminate it from the inside.

And once again, the finished jack-o’-lantern! Happy Halloween!